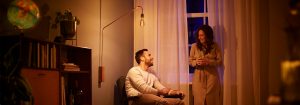
Learn how to use three types of light and make your own lighting plan
Lighting your home: the basics
There are basically three types of lighting, when combined correctly in layers, will create the optimum inspirational lighting solution. Each layer of light has its individual effect, but can be combined to create a magical overall design.


Ambiant lighting
Ambiant light provides overall room lighting.
This is the first layer of light to start with when creating a lighting plan. Ambiant light ensures a diffused, even level of light that provides overall room illumination.


Task lighting
Direct, focused light to help with a close range of work, like food prep, reading, or hobbies.
Some projects and tasks require extra light to see details. Use task lighting for workspaces like kitchen counters, desks, or anywhere that you need more light.


Accent Lighting
Create focal points or highlight the beautiful features of your home with accent light.
Brighter than ambiant light but more focused, accent lighting is the finishing touch to make a room more interesting. Use it highlight a collection, artwork, architectural details, or anything that you want to draw attention to.
Now you understand more about the three layers of light and how to use them. Try to have two or three of the layers in each room. Include dimmable light to get a wider range of ambiance. Your rooms will be more comfortable, more functional, and more appealing to you and your guests. Inspired to create a lighting plan? Read the next section.
Learn how to light a room with our lighting plan guide

Step 1. Draft your floorplan
Helpful tips:
- Measure your space and draw it on the graph paper. Recommended scale is 1:50.
- Mark any fixed elements such as windows, doors and chimneys.
- Draw in your furniture.

Step 2. Map out where you need light
Identify your layers of light:
- Ambiance: Overall room lighting for relaxing and socializing
- Task: Direct, bright light for working, reading and hobby spaces
- Accent: Focused bright light to create decorative points of interest
Consider who is going to use this space and what they will be doing in it. Imagine the range of activities and what kind of light you will need for each. Your room can have dimmable light for yoga practice and a table with a bright task light over it for children to do homework, for example.

Step 3. Draw each light zone and your fixtures
Defining a light zone:
Each zone is a location where your light sources provide the layers of light that you need for the activities and moods of your room. Draw in the fixture or light source using the icons shown below.
Don't forget to mark your light switches.

Recessed light
Highlight objects and wash the walls with light for ambiance
Placement
Ceiling spots: appr. 60cm from the wall
Built in downlight: appr. 35cm from the wall
Ambient spots: appr. 1m distance between spots
icon ![]()
Lighting type
![]() Ambiance
Ambiance
![]() Accent
Accent

Wall mounted light
Provide ambient or accent lighting
Placement
Should be spaced at least 20cm apart at a height of 180-190cm from the floor, depending on ceiling height.
icon ![]()
Lighting type
![]() Ambiance
Ambiance
![]() Accent
Accent

Ceiling mounted light
Produce general light and contribute to the overall ambiance of your home
Placement
In the corners of a room, on the ceiling
icon ![]()
Lighting type
![]() Ambiance
Ambiance
![]() Task
Task

Floor & desk light
Create a decorative effect and help with tasks such as reading
Placement
In the corners of a room, or close to a couch or at the side of the bed
icon ![]()
Lighting type
![]() Task
Task
Step 4. Find the right lights
Nicely done!
Now that your lighting plan is complete, you can choose the right light bulbs and fixtures to get the look and mood that you want for each room. LED light has a wide variety of options and features. Choose the brightness and colour temperature that best meets your needs and style. Don't forget to share your newly lighted room with us by posting your before and after photos on social media with #philipsLED
Fixtures
Ambience lighting
Task lighting
Accent lighting
Smart lighting
Lighting tips for every room

Living room lighting
Learn how to optimally light your living room so you can create the perfect living space.

Bedroom lighting
Besides nightly rest, the bedroom is a place for relaxation, using our phones, watching TV, or reading a book. The ultimate place for wellbeing requires the right light to fulfill your different needs.

Kitchen lighting
Get together to cook, catch up over a meal and celebrate. With the best kitchen lighting to bring it all to life. Find kitchen lighting ideas that are beautifully practical, functional, but also warm and inviting.

Bathroom lighting
Here are the best bathroom lighting ideas to help you light every moment. From bright functional LED lights to mirror lighting and color-changing mood lighting.

Desk and table lighting
Your home can make a great workplace. We can show you how to use our LED bulbs to create the perfect home office lighting atmosphere. You can work in a relaxed, but productive manner and make light work for whatever task you have at hand.

Hallway lighting
Find the right bulb for every fixture. From brilliant bright white light to soft warm dim light, well lit hallways play a functional role in guiding you and your guests into your home.

